Composting with Red Worms
Red worms do all the work for you! Through nature’s conversion process, red worms give you the world’s greatest fertilizer! These “master composters” recycle our green waste, reduce what we put into our landfills, and we get to reuse the end product making our gardens organic!
Read on for more information on caring for your Red Worms!!!
Red Worm Care
-
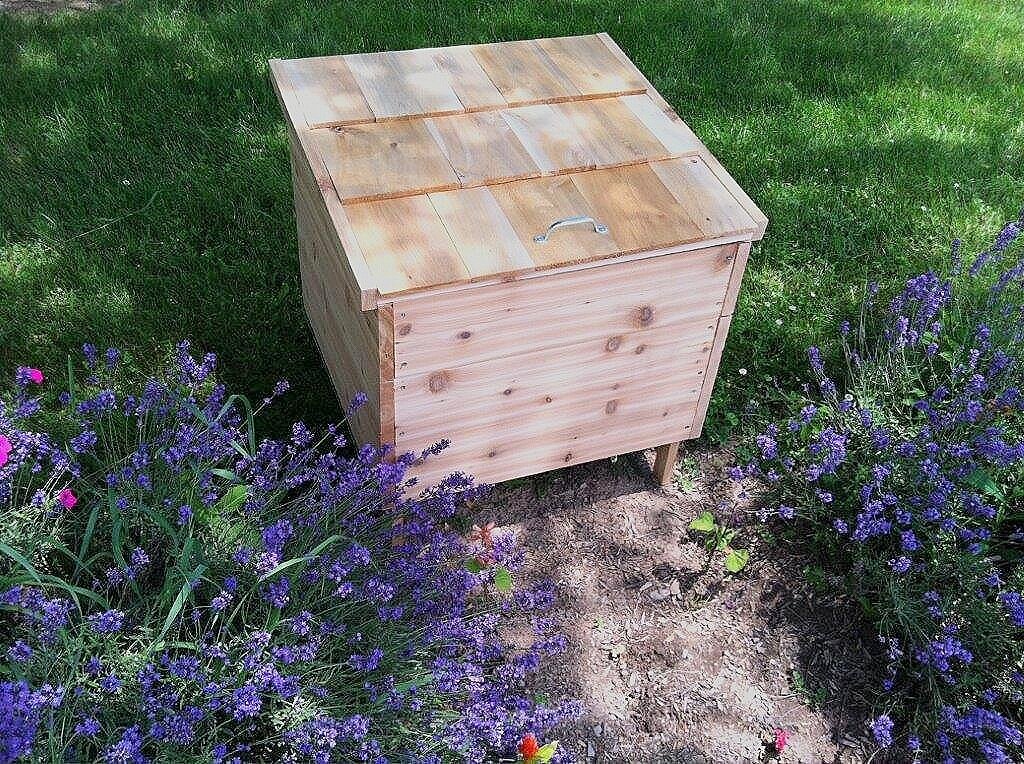
If your box is outside, up against a garage or house is ideal. This will help protect worms in the winter from outdoor elements. Stay away from an area in direct sunlight. Ideal temps for healthy Red Worms should be between 40 and 85 degrees F. Indoors, the ideal home for your worm box is somewhere dark. In the basement, under the sink, or in a closet.
-
YES: Green waste/ fruit and vegetable waste (citrus fruit can be added, in moderation). Shredded newspaper, used paper towels (common sense applies here- avoid color printed paper towel), cardboard (great idea to add these carbon rich materials at the same time you add any wet food waste- to help add moisture to the dry material), egg shells, coffee grounds, tea bags, grass clippings, and leaf waste (good insulation in the fall for an outside worm box).
***Remember, everything in moderation when trying to get a good balance of nutrients***
NO: Human/ pet waste, non-biodegradable materials, dairy/ meat oils/ grease/ harsh chemicals
**Remember- the smaller the pieces of food the faster they will eat it. If you are using a bin, be sure to give them time to work through the food you give them before giving more.**
-
Read more below!
-
That sour smell coming from your worm composting bin is because it’s too wet. This happens more often if you use Rubbermaid containers than it does with wood containers. Either you started out with bedding that was too wet, or you’ve put too much food with high water content in your bin as feedstock (melons, etc.). Your bedding and finished vermicompost should be damp, like a wrung out sponge. Not dry, and not dripping wet.
How to fix the problem: Put a temporary freeze on feeding your worms food that is high in water content. take some dry worm bedding material (newspaper, cardboard, etc.) and place it into the bin. Scatter the material on top of the existing bedding. The dry material will absorb some of the moisture. If you have a bin that doesn’t have drain holes in the bottom, make a deep pocket in your bedding and place a handful of dry bedding material into the pocket. Be patient. It will take some time for the dry material to absorb the moisture. Only add more dry material if you still have a moisture problem, AND all the dry material you added before is wet. When the problem is corrected, only feed your worms foods with high water content in moderation.
-
Worms breathe through their skin, and their skin needs to be moist in order for this to happen. When worms get too dry, they are not only dehydrated, but they are suffocating as well. Worm bins usually only get too dry when you start a bin without pre-wetting the bedding, or you add too much dry bedding to your bin. Only add dry bedding to a vermicomposting bin if you have a moisture problem (as described above).
How to fix the problem:
Pre-moisten all bedding before putting it into the vermicomposting bin. We like the soak-and-wring-dry method. Soak bedding material overnight in a container of water. Then grab a handful of bedding, and squeeze as much water as you can out of it then spread it out through your worm bin. If you’ve started your bin with moist bedding and it dries up, you can use a spray bottle set to mist and give them a few squirts every once in a while. Be aware that the bedding on the bottom of your bin may be a lot wetter than the bedding on top of your bin. If you still have moist bedding below, you are fine.
-
Your worms are climbing the walls of your vermicomposting bin and your bedding feels like a hot compost pile. That is because you mixed your feedstock up with your bedding and made it an indoor compost pile, and your worms don’t like that.
How to fix the problem: Start by salvaging as many of your worms as possible and get the in a new worm bin. The food and bedding has already been mixed up, and unless you want to go through it bit by bit, you should probably just add it to the outdoor compost pile. Any remaining worms will scramble to safety and start breeding in your compost pile, which will be a good thing. Remember to only top feed or pocket- feed your worms. Never make a salad out of your bedding and food. Your worms will find the food. Trust me!
-
It has been said that under the ideal conditions, composting worms can eat their body weight each day. This is true, but everyone seems to ignore the part about “under ideal conditions” . Red wigglers are voracious eaters, but “Can eat” and “will eat” are two different things. People also forget to take into account the bedding the worms eat as well. If you are new to vermicomposting, or are just starting a new bin, start slowly. Give the worms a few days to get used to their new environment before you start feeding them. Then, give them a small amount of food and see how long it takes for that food to completely disappear. Then, give them more. You’ll start to get a feel for how much food they need, and how quickly they will eat it. Overfeeding will lead to rotting food and rancid smells, not to mention acidic worm bins which will make your worms want to flee. Notice that “under feeding” isn’t on the list. That’s because it’s pretty hard to starve your worms if you have fresh bedding. I’ve heard of people going on vacation and not feeding their worms for 2-3 months, and coming back to a thriving worm population.
-
We all love our worms, but you can love your worms too much. People new to vermicomposting are very susceptible to this phenomenon. Disturbing the bedding to show off or watch what is going on can lead to unhappy worms. Imagine someone ripping off the roof of your house to see what you were up to.
What to do: Try to only open your bins to check conditions, feed your worms, or clean out the bins when they are ready. Of course, part of the fun of having a vermicomposting bin is to watch the worms. Just keep it to a minimum.
-
Poor bin design pr having an overly wet worm bin can lead to airflow problems. You start getting anaerobic conditions which affects the health of your worm bin. Anaerobic conditions make your vermicomposting bin sour and stinky.
What to do: Start with a well designed worm bin with plenty of ventilation. Also, make sure you don’t have an overly wet worm bin. Bedding and finished vermicompost should be damp, like a wrung out sponge.
-
Worms will eat almost anyhing organic, but so will a 2 year old boy- it doesn’t mean we should feed them everything. Stay away from feeding them cheese, dairy, oil, bread, and meat. Eventually, this stuff will break down and the worms will eat it, but it could be a stinky wait.
-
You’ve made one or more of the mistakes above. Now what? The worst thing you can do is overreact. Patience and moderation is the key to successfully raising worms. Once you realize that you have made a mistake, act slowly to correct it. Take a small corrective action and wait to see the result. It may take days, or even weeks for that action to fully develop. Be patient.
-
Everyone who has vermicomposting worms for any period of time has made one or more mistakes above. Sometimes we’ve made them multiple times. Don’t give up! Vermicomposting is a fun, relaxing, educational, rewarding, and sometimes addicting hobby that can reap HUGE benefits in your garden. Just have fun with it!